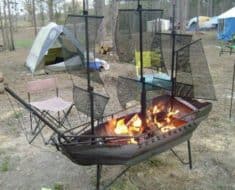
Many of us are already getting the Summer’s itch and after you see this you will really be itching for Summer!
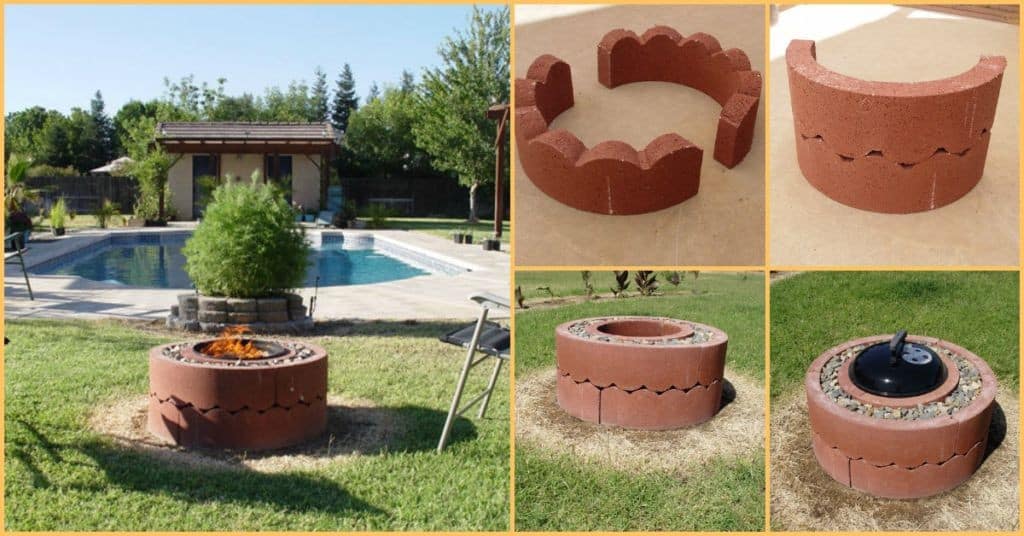
Here is how you can build one of the coolest fire pits with a built in grill for just $50!
Check it out and share, share, share this one! #DIY
Materials Needed :
- Weber Smokey Joe Portable charcoal grill or equivalent 14″ diameter grill to be an insert in the rings ($30 new)
- Four sections of 14″ inside diameter concrete tree rings ($2 to $3 each ) -Six sections of 24″ inside diameter concrete tree ring ($2 to $3 each = $12-$18 total)
- Two cubic feet of small stones, pebbles, road gravel or decorative rock ($0-$20 depending on how fancy you choose to get!)
Total cost: $50-$80 depending on your taste in stones.
Step 1 : Constructing The Inner Ring!

Helpful advice :
Find a nice level area of your yard or create a level circle approximately 3 feet in diameter. It’s not absolutely necessary but we sprayed our pit area with weed and grass killer to make a bare spot. You will notice the ring of browned grass surrounding the pit in the final photos. This is due to the weed killer and not the result of heat from the fire. We also placed a layer of weed barrier cloth under the pit to prevent grass/weed from growing up into the pit. The tree rings will be more stable on bare earth than on grass, particularly if you have Bermuda grass like we do. Also, you should have no problem if you want to place your pit on top of a concrete or brick patio.
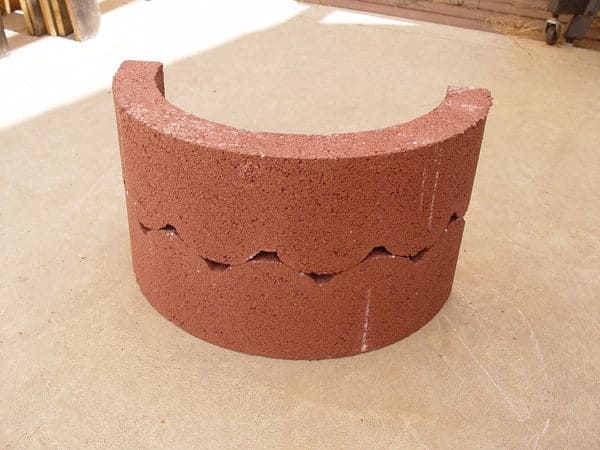
The trick to turning tree rings into a decent looking fire pit is to make the ring two sections tall by turning the fluted top sections upside down so they interlock with the fluted bottom sections. The first photo shows what the 14″ tree ring sections look like when you buy them from the store and the second photo shows them stacked. They don’t fit perfectly but the small air gaps look sort of decorative in my estimation and are barely noticeable once the unit is being used.
Step 2 : Adding An Outer Ring!
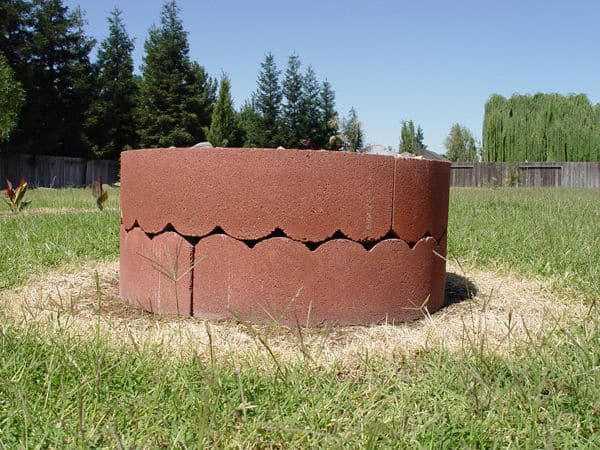
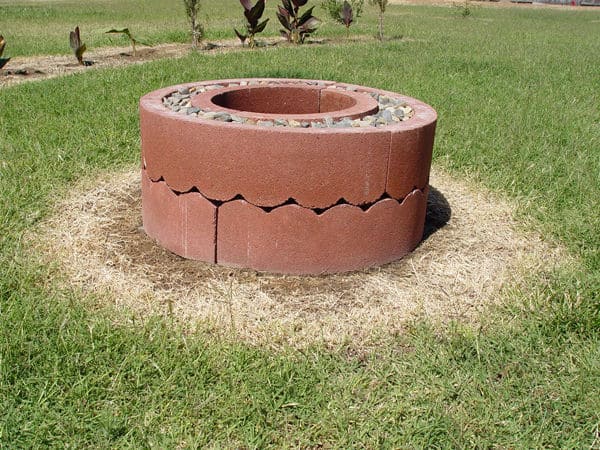
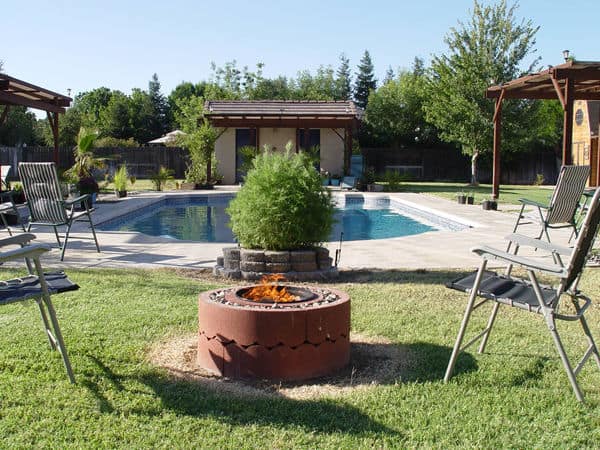
We thought the 14″ tree rings looked a little puny by themselves, so to give the fire pit more mass we surrounded the inner ring of 14″ tree ring sections with an outer ring of 24″ diameter sections. The sections are 2″ thick, so the outer diameter of the completed fire pit will be 28″.
Note that the 24″ outer rings have a very convenient tab type locking design. One end of each section has a tab and the other end has a slot. This helps a great deal to stabilize the rings when they are stacked two high.
Step 3 : Filling The Void!
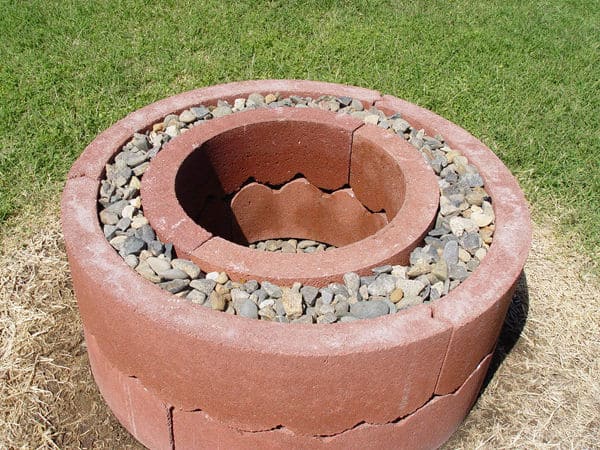
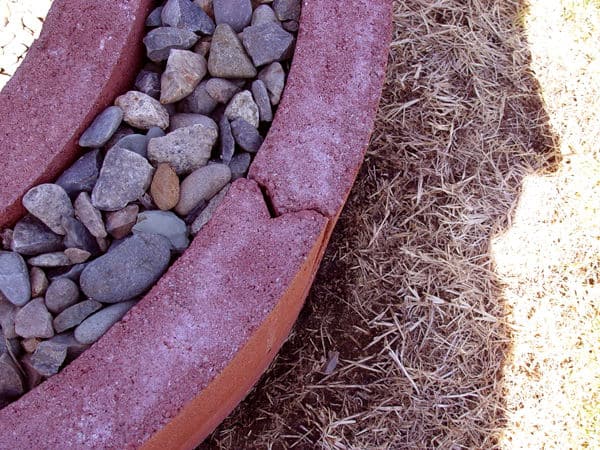
You will quickly notice that when the 14″ rings are stacked inside the 24″ rings that there is a 3″ gap between the inner and outer rings. You will also notice that each 14″ ring is about an inch shorter than each 24″ ring. To solve both of these problems the outer ring is erected first and then filled approximately 2″ deep with small stones. The inner ring is then set on top of those stones. You’ll have to do a bit of trial and error to insure the tops of the inner and outer rings will be level when they are completed. Once the inner and outer rings are in place, fill the 3″ void between the rings with more stone.
Step 4 : Installing The Weber!
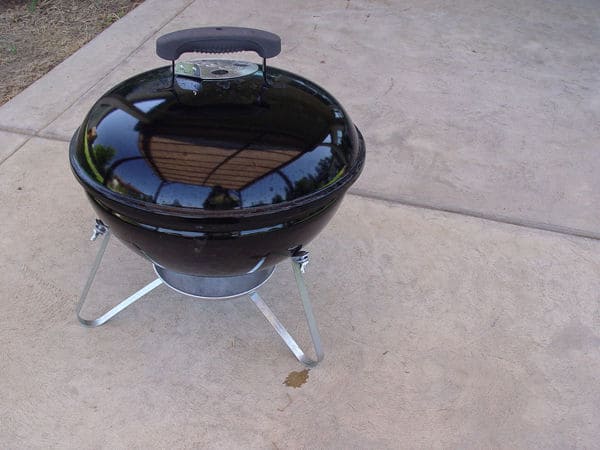
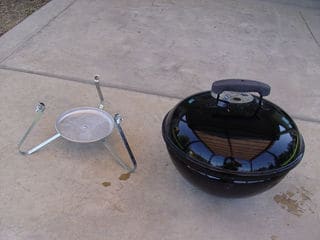
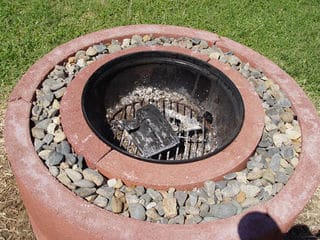
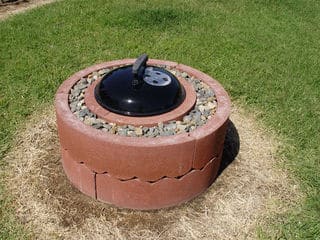
The Weber Smokey Joe grill may come with legs attached. If so, unscrew the 3 connecting screws and set aside the legs. In an amazingly beneficial coincidence, the Weber grill is perfectly sized to slip right into the inner circle of the pit and just enough lip remains above the surface of the pit for the cover to fit tightly in place. Once the Weber is in place and you start a fire, it would be difficult and perhaps hazardous to adjust the lower air vent of the grill. So set the vent opening however you want before you put the grill in place. I set ours about half open and it works great for creating nice small fires. And when the cover is put on and the top vent closed, the fire will go out in very short order. If you want or need more or less bottom air for your fire, you can easily remove the grill to adjust it between fires when the unit is cool.
Step 5 : Light It Up!
via – instructables