Source: https://s3-eu-west-2.amazonaws.com/
Can you modify your home without a professional? Is it possible to fit light sockets to an electrician’s standards?
DIY can be hugely satisfying – for several people, it’s a hobby, but others are actually turning their favourite pursuits into careers.
Coming back to the above questions, the answers to both are indeed, yes. Here, we explain how.
Required Tools
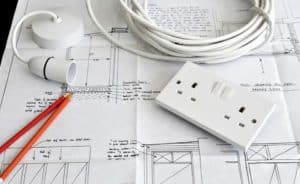
Before you begin this project, assemble the right tool kit. If you don’t, this may become a trickier task than it needs to be.
Good investment could prevent frustration. A flat-tip screwdriver is paramount for this activity. Likewise, you’ll need a non-contact voltage sensor.
Most importantly, you should pinpoint the right kind of electrical socket for you. For the best results, look for a safe and reliable model. Luckily, specialists like Schneider Electrical can guarantee both of these qualities in all of their light switches and electrical sockets.
Of course, considering size and plug fitting requirements will help you make the most of your purchase.
Preparation
Source: https://www.247homerescue.co.uk/
Safety is key for this activity. To add a socket to your electrical system, you must ensure that it is compliant with all legal regulations. You may also need to identify whether the circuit requires RCD protection. These are precautions that nobody can afford to skip.
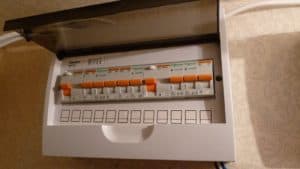
Ahead of this job, switch off central power at the fuse (or unit) box. Then, separate the circuit you will be working on by detaching its fuse.
If you can, turn off the breaker; and, if it’s possible, lock it. Prior to starting, make sure that the circuit is dead. You can do this with a voltage meter for lighting circuits.
It might be useful to notify others of your DIY plans. You can do this easily by sticking a note to the relevant unit.
Fitting

Source: https://www.bobvila.com/
Stage One
To begin, replace the socket faceplate, before removing it from the wall. Once you’ve done this, loosen the terminal screws, take out the cable cores (from the faceplate), and then strip the ends.
Stage Two
If your earth core is exposed, don’t worry. You can rectify this by placing yellow/green sleeving over it.
All metal back boxes must be earthed. To achieve this, run a short earth cable between the earth terminals of the box and faceplate.
Stage Three
For the penultimate step, you will need to attach the live core (or cores) to the live terminal.
After this, connect the neutral core to the neutral terminal, and then the earth to the earth terminal.
Remember that (L) represents live; that (N) is the symbol for neutral; and that (E) stands for earth.
Stage Four
Once you’ve sorted out the wires, tighten all terminal screws completely. Follow this by securing the new faceplate.
To conclude, apply the socket tester. That way, you can be certain that all components are wired properly.
After this, your new appliance will be ready to use.
When you know how, you don’t need an electrician to fit a light socket. With these tips, you can master this skill and you’ll never need to call out an electrician again – because you can perform this duty to a professional level.